Building a durable outdoor space begins with understanding the best practices for Trex deck framing. Proper deck framing ensures the structural integrity and long life of a deck, especially when using high-quality composite decking like Trex.
This guide will detail everything from suitable materials to installation techniques, offering insight into creating a reliable framework for any Trex project.
Why Strong Framing Is Essential for Trex Decks
Ensuring a stable and strong support structure is a foundational step in deck construction. Trex, known for its innovative and sustainable composite decking, requires proper framing to perform at its best. The substructure supports the decking and helps prevent common issues such as sagging or warping, particularly under heavy use or varying weather conditions.
Before diving into construction, it is important to select the right framing materials that will ensure the strength and longevity of a Trex deck.
Choosing the Right Framing Materials for Trex Decks

Selecting the right materials for framing can have a significant impact on the durability and stability of a Trex deck. Here are the primary options to consider:
Pressure-Treated Lumber
Pressure-treated lumber is a popular choice for deck framing because it is both cost-effective and readily available, making it accessible for a wide range of projects. However, it comes with certain drawbacks; over time, this type of wood can warp or deteriorate, particularly when exposed to changing moisture levels.
- Best Use Cases: Suitable for budget-friendly projects with planned routine maintenance.
Kiln-Dried After Treatment (KDAT) Lumber
KDAT lumber offers notable stability benefits due to its post-treatment drying process, which reduces moisture content and limits shrinkage or movement. This controlled drying makes it a more reliable option for deck framing, contributing to consistent alignment and structural integrity over time.
- Ideal Projects: Best for those investing in quality framing to reduce future maintenance needs.
Steel Framing
Steel framing is known for its impressive strength and long-lasting performance, making it a dependable choice that resists common issues like rot and structural shifting. However, it’s important to note that installing steel framing may require specialized tools and expertise, and it often comes at a higher cost compared to traditional wood options.
- Recommended Product: Trex Elevations® steel framing system pairs well with Trex decking, providing reliable moisture resistance.
With the right materials selected, it’s time to move on to the step-by-step guidelines for framing a Trex deck to ensure a solid and lasting structure.
Step-by-Step Framing Guidelines for Trex Decks

Adhering to Trex’s specifications ensures a resilient and safe deck structure. Proper substructure preparation is a key step that lays the foundation for long-term deck stability. Here are the guidelines and steps for framing your Trex deck:
1. Substructure Preparation Steps
- Leveling the Ground: Clear any debris and level the ground to prevent irregularities that could affect the deck’s substructure.
- Drainage Considerations: Ensure the site has adequate drainage to avoid water pooling, which can lead to moisture issues over time.
- Ground Stabilization: For areas prone to shifting soil, a compacted gravel base can provide extra stability and reduce movement.
2. Ledger Board Installation
- Attachment Methods: Secure the ledger board to the house using lag screws or bolts, spaced approximately 16 inches apart, to create a strong connection. Ensure the ledger is properly anchored to a solid structural surface, such as a rim joist.
- Water Protection: Install flashing above the ledger board to direct water away and prevent damage. This step is essential to avoid moisture buildup that could weaken the connection and compromise the deck’s safety.
- Alignment Check: Verify that the ledger board is level before securing it, as an uneven ledger can affect the alignment of the entire deck frame.
3. Beam Placement
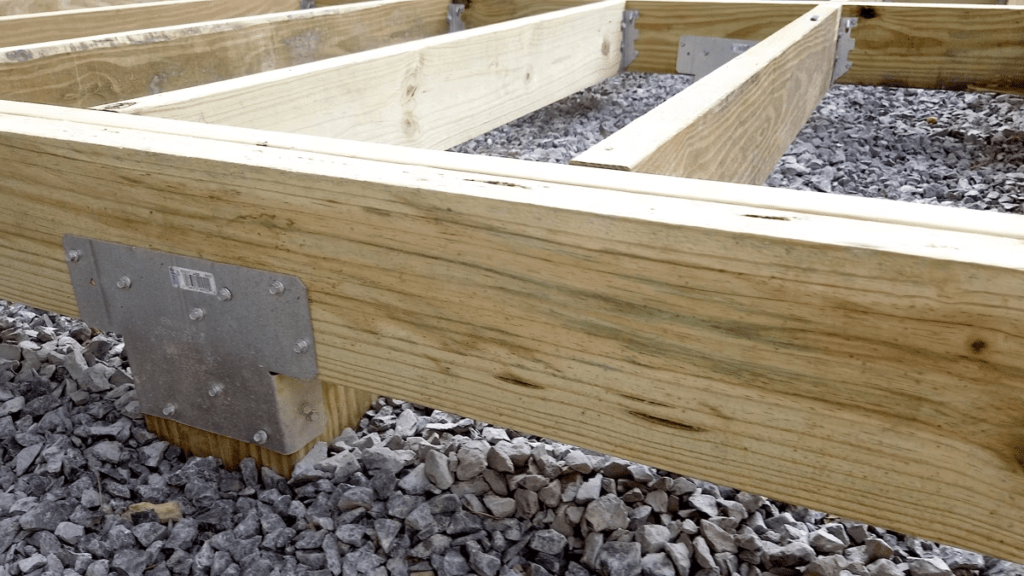
- Beam Configuration: Use doubled or tripled 2×10 or 2×12 beams based on span and load needs. For example, double 2×10 beams typically support spans up to 10 feet, while double 2×12 beams handle longer spans.
- Beam Spacing: Space beams 8 to 12 feet apart for optimal load distribution. High-traffic or large decks benefit from closer spacing for extra support.
- Support Considerations: Beams should be supported by posts or piers every 6 to 8 feet, with ends extending at least 1 1/2 inches past the post for stability.
4. Joist Spacing and Orientation
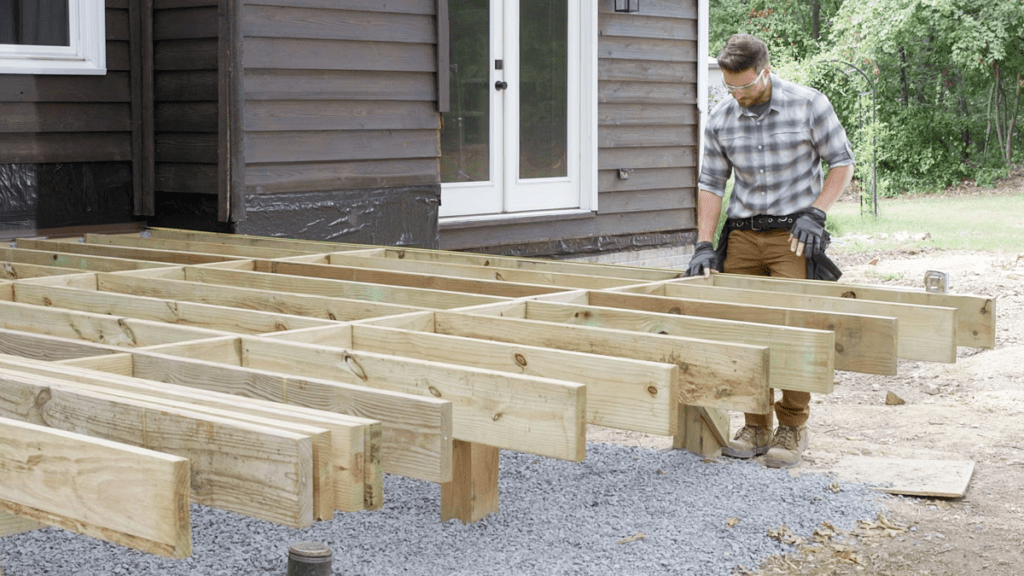
- Standard Spacing: Place joists 16 inches on center for perpendicular decking layouts.
- Diagonal Layouts: Reduce spacing to 12 inches on center for diagonal decking to maintain support.
Reasoning: Proper spacing prevents sagging and maintains the deck’s structural integrity.
5. Detailed Framing Layout Tips
- Marking Joist Positions: Use chalk lines to mark joist positions, ensuring consistent spacing. Accurate marking is essential for alignment and stability.
- Verifying Alignment: Double-check that all joists are parallel and level before securing them to ensure a smooth surface for the deck boards.
6. Pre-Installation Checks
- Level and Alignment: Use a level to confirm that all beams and joists are even before securing them. This step helps prevent uneven decking surfaces and structural problems.
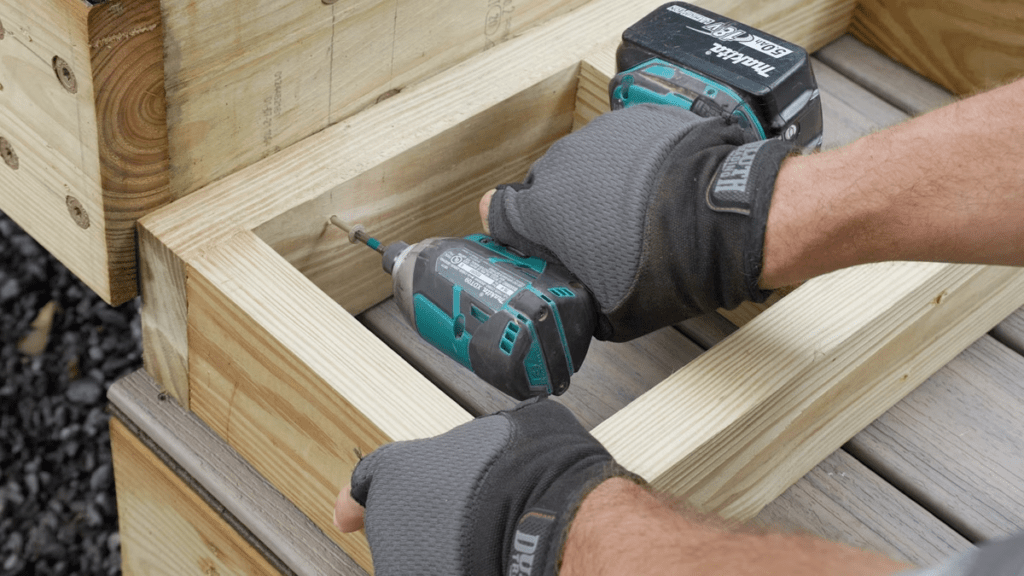
- Fastener Placement: Ensure fasteners are positioned properly to secure the structure without splitting the wood or misaligning components.
By incorporating these detailed steps, including ledger board installation, you’ll build a reliable framework that supports the durability and lifespan of your Trex deck. Once the framing is in place, following proven practices can help maintain a long-lasting and durable deck substructure.
Proven Practices for a Long-Lasting Deck Substructure

Ensuring a dependable substructure goes beyond choosing materials. Follow these practices for optimal results:
Use of Joist Tape
Applying joist tape to the tops of joists and beams creates a moisture barrier that helps prevent water infiltration, reducing the risk of rot, decay, and wood weakening over time. By sealing areas where decking screws penetrate, joist tape prevents water from collecting in exposed spots. This practice extends the lifespan of the wooden substructure and minimizes future maintenance costs, ensuring a sturdy and long-lasting Trex deck.
Ventilation Considerations
Maintaining airflow beneath the deck is important to prevent moisture buildup that could lead to mold or structural issues.
Hardware and Connectors
Selecting the right hardware is crucial for maintaining the strength and longevity of a Trex deck.
- Use corrosion-resistant fasteners, such as galvanized or stainless-steel options, to prevent rust and ensure durability.
- For a cleaner appearance and seamless finish, consider hidden fasteners specifically designed for composite decking. These fasteners secure the deck boards without visible screws, enhancing the aesthetic and minimizing the risk of surface damage.
Proper installation of brackets, connectors, and hidden fasteners not only improves the deck’s appearance but also reinforces overall safety and structural integrity.
Regular Inspections
Regular checks for wear, such as rot in wooden joists or loose fasteners, can prevent small issues from becoming costly repairs.
To build a reliable deck, it’s also important to be aware of common framing mistakes and understand how to avoid them.
Common Deck Framing Mistakes and How to Avoid Them
Anticipating common errors can streamline planning and build a more reliable structure. Here are mistakes to avoid:
- Inaccurate Joist Spacing: This can lead to uneven surfaces, sagging, and compromised structural integrity.
- Using Untreated Lumber: Non-treated wood can deteriorate quickly when exposed to moisture, leading to rot and weakening of the substructure.
- Neglecting Flashing: Skipping flashing around the ledger board can result in water damage and compromise the connection between the deck and the house.
- Overlooking Code Requirements: Not adhering to local building codes can result in structural issues and potential safety hazards. Always verify that your deck plans meet or exceed code standards.
Build with Confidence Using Lumber Plus Deck Solutions

Investing in effective framing methods supports the long-term success of your Trex deck. Lumber Plus offers a range of quality decking and framing solutions designed for builders and DIY enthusiasts alike. Our commitment to sustainability and durable products makes us a trusted partner for your outdoor projects. Contact us today for more information.


