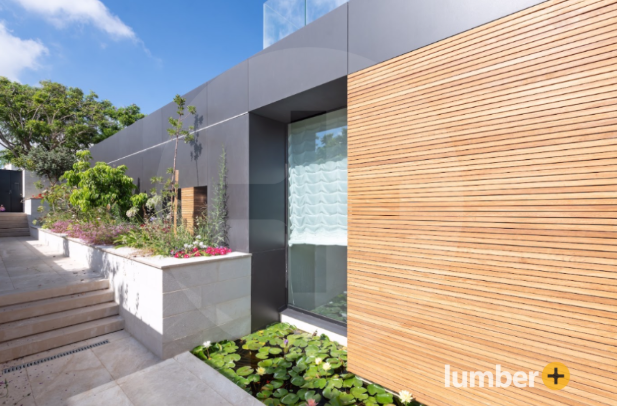
Curved Trex decking introduces unique design possibilities for outdoor spaces, blending smooth aesthetics with functionality. Trex, known for its durability and low-maintenance qualities, is a popular choice for creative projects that push the boundaries of traditional straight-edged decking.
Learning how to bend Trex decking allows professionals and DIY enthusiasts to craft customized, visually striking designs while embracing sustainability.
Trex Decking: Best Options for Curving
Trex decking combines recycled wood fibers and plastic to create a durable, sustainable material. However, not all Trex product lines are suitable for bending due to differences in design and structural properties.
Recommended for Bending
Trex Transcend and Trex Select are ideal for bending applications because of their solid, full-profile construction. Unlike scalloped boards, such as those in the Trex Enhance line, which are prone to warping under heat, these products maintain their structural integrity during the heating and shaping process. This durability and consistency make Transcend and Select the go-to choices for achieving precise and lasting curved designs.
Sustainability is Central
Trex’s commitment to sustainability makes these products even more appealing. Manufactured with 95% recycled content, curved Trex decking reduces waste while providing a premium outdoor solution. For eco-conscious builders and homeowners, this aligns perfectly with green construction goals.
Tools and Materials for Curving Trex Decking
Achieving a perfectly curved Trex deck begins with careful preparation and the right tools. Here’s a breakdown of what you’ll need and how to use it effectively:
Heating Equipment
To make Trex decking pliable for bending, controlled heat is essential:
- Heat Blankets: Specialized heat blankets designed for composite materials distribute heat evenly, ensuring the decking reaches the required temperature for bending without damage.
- High-Temperature Heat Guns: Ideal for heating smaller sections or making adjustments. Move the heat source continuously to avoid scorching or uneven heating.
Safety Gear
Working with high heat and composite materials requires adequate protection:
- Heat-Resistant Gloves: Protect your hands from high temperatures while handling heated boards.
- Protective Clothing: Wear long sleeves and heat-resistant fabric to shield your skin.
- Goggles: Prevent debris or heat exposure from damaging your eyes.
- Fire Extinguisher: Always keep one nearby in case of accidental fires.
- Ventilation: Work in an open or well-ventilated area to reduce exposure to fumes. Fans can help improve airflow for added safety.
Clamps
Clamps are essential for securing heated decking to the bending jig:
- Quantity and Size: Use multiple clamps that can accommodate the width of Trex boards.
- Proper Application: Space the clamps evenly along the curve to maintain consistent pressure and prevent the decking from shifting as it cools.
Planning and Building the Bending Jig
Thorough planning ensures the bending process goes smoothly. Here’s how to prepare before heating your decking:
1. Design Your Curve:
Measure and outline the desired radius to align with your deck layout. This step determines the bending jig’s dimensions and ensures a seamless fit with your overall design.
2. Create a Template
Use flexible materials such as thin plywood or cardboard to visualize the curve. Adjust the template as needed before finalizing the jig to save time during the bending process.
3. Build the Jig:
Construct a sturdy form to shape the decking:
- Use plywood sheets as the base and flexible composite 2x2s to form the curve.
- Secure the jig firmly to a work surface or the ground to prevent movement during use.
By starting with a well-constructed jig, you’ll ensure the decking maintains its intended shape throughout the bending and cooling stages.
Step-by-Step Guide to Bending Trex Decking
Heating the Decking
- Setup: Position heating blankets or heat guns evenly along the decking section to be bent.
- Temperature Control: Gradually heat the board to the manufacturer’s recommended temperature. Avoid overheating, as this can scorch or weaken the material.
- Work in Sections: Heat one portion of the board at a time to maintain control and consistency throughout the process.
Shaping the Deck Boards
- Align with the Jig: Once the decking becomes pliable, carefully position it along the jig to match the desired curve.
- Secure with Clamps: Use clamps to hold the decking firmly against the jig while it cools.
- Cooling Period: Allow the board to cool completely before removing the clamps. Premature removal may cause the curve to lose its form.
Installation
- Adjust the Substructure: Ensure the framing matches the curve, with joists properly aligned for support.
- Attach the Decking: Use Trex-recommended fasteners to secure the curved boards to the substructure, ensuring durability and stability.
With these steps, you can achieve professional-quality results that enhance your outdoor living space.
Special Considerations for Attaching Curved Trex Deck Boards
Attaching curved Trex decking to your deck structure requires meticulous planning and execution to ensure both aesthetic appeal and structural integrity. Here are key considerations to keep in mind:
Substructure Alignment
The deck’s substructure must precisely follow the curve of the Trex decking. This involves shaping the joists and beams to match the desired curvature, ensuring that the decking is adequately supported along its entire length. Accurate measurements and cuts are essential to achieve a seamless fit.
Fastening Methods
Trex recommends using their proprietary Trex® Hideaway® Hidden Fasteners for a clean, fastener-free surface. These fasteners are designed to work with grooved deck boards, providing uniform spacing and a sleek appearance. For curved sections, ensure that the fasteners are installed at appropriate intervals to maintain the deck’s structural integrity.
Thermal Expansion and Contraction
Composite materials like Trex decking can expand and contract with temperature changes. When installing curved decking, it’s crucial to account for this movement by leaving appropriate gaps between boards and at the ends. Refer to Trex’s installation guidelines for specific spacing recommendations to accommodate thermal expansion
Once your curved Trex decking is securely installed, proper maintenance will help preserve its structural integrity and keep it looking its best for years to come.
Maintenance Tips for Curved Trex Decking
Once installed, curved Trex decking requires minimal maintenance to retain its beauty and functionality:
- Regular Cleaning: Wash the decking with soap and water or a composite decking cleaner to remove dirt and debris.
- Routine Inspections: Check for loose fasteners and inspect the structure for signs of wear, especially in high-traffic areas.
- Protect the Substructure: Apply joist tape to guard against moisture and extend the lifespan of your deck’s framing.
These simple steps will ensure your curved deck remains visually appealing and structurally sound for years to come.
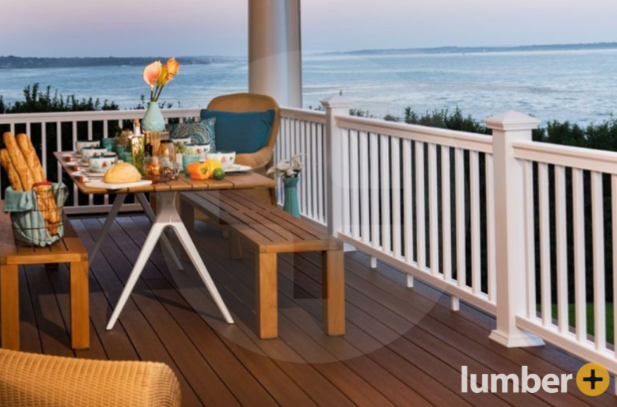
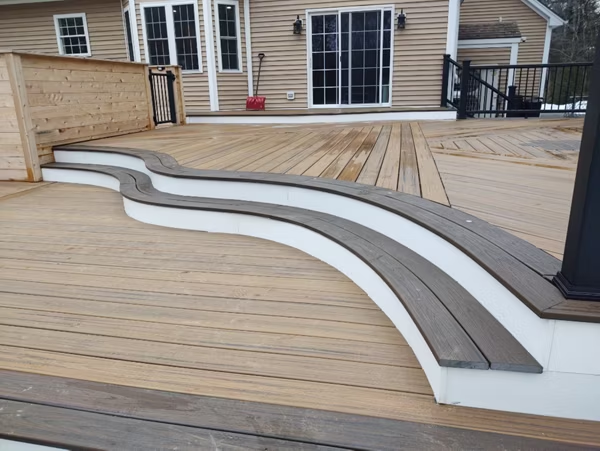
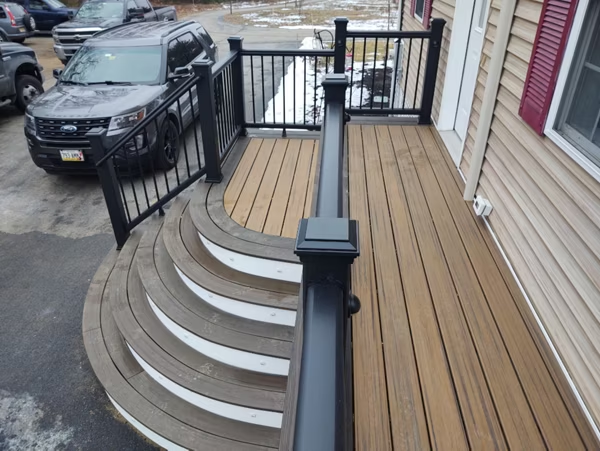
Benefits of Adding Curves to Trex Decking
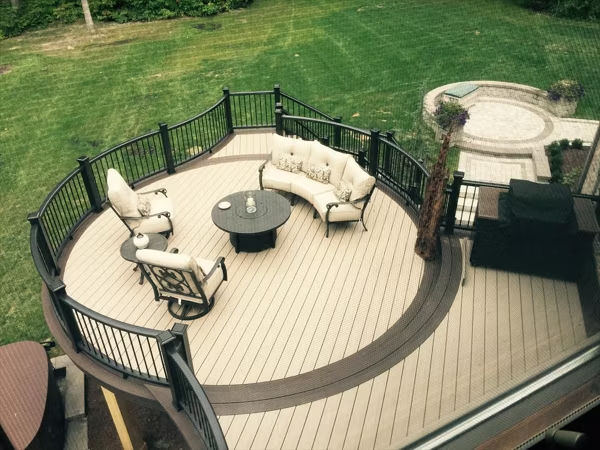
Curved decking offers more than just visual interest—it adds functionality and design versatility. Consider these possibilities:
- Dynamic Edges: Seamlessly transition around landscaping features like pools or garden beds.
- Integrated Seating: Create built-in curved benches that add style and comfort.
- Distinctive Staircases: Use curved boards to craft elegant, space-saving stair designs.
- Custom Features: Incorporate curved railings or planters to complement your deck’s flow and increase functionality.
These creative design ideas make curved Trex decking an exceptional choice for homeowners looking to personalize their outdoor spaces.
Pro Tips for Success
For those attempting curved decking for the first time, here are some helpful tips:
- Start with Larger Curves: These are easier to manage and less prone to material stress during heating.
- Heat Evenly: Avoid focusing heat on one spot to prevent scorching or uneven pliability.
- Practice Patience: Allow boards to cool completely before removing clamps to ensure the curve holds its shape.
- Avoid Common Mistakes: Ensure your jig is secure, and always heat the decking gradually to avoid damaging the material.
These insights will help you navigate the process with confidence, whether you’re a seasoned pro or a DIY enthusiast.
When Professional Expertise Makes Sense
While bending Trex decking is a rewarding DIY project, certain scenarios benefit from professional expertise. For example:
- Tight Radii: Complex or intricate curves require advanced tools and techniques.
- Lack of Equipment: Professionals often use decking ovens or heating pads for precise, even heating.
- Large-Scale Projects: For extensive designs, hiring experts ensures efficiency and quality results.
A professional can help bring your vision to life while ensuring compliance with safety and structural standards.
Build Unique Curved Decks with Lumber Plus
Ready to transform your outdoor space with a stunning curved Trex deck?
Contact Lumber Plus today for expert guidance and premium materials to bring your vision to life.